
I raised Cecropia, Polyphemus and Promethea moths for a few years and these are instructions based on my experiences. The timing of what I did works for eastern Minnesota and west-central Wisconsin – in other parts of the country the timing will be different. These are the methods that worked best for me, but you may find other methods that work better for you.
The adults of these Giant Silk Moths (the family Saturniidae) don’t eat, so it’s possible to keep females for a day or two to try to mate them and get eggs.
Lifecycle
These four moth species all emerge from their cocoons in late May or June. They mate and lay eggs in the next day or two – adult moths don’t eat, so they only live for a few days. The caterpillars hatch within a week or so after the eggs were laid. The caterpillars eat and grow all summer, and make their cocoons in August or September. They go through the pupa stage – the change from a caterpillar to an adult – inside their cocoons. They over winter in their cocoons, and the adults emerge the following spring.
Luna and Polyphemus moths sometimes go through two generations in one year. Some adults will emerge from those early cocoons in mid-summer, and they will go through another cycle and make cocoons in the fall which will overwinter.
Eggs to Caterpillars
Eggs are laid on whatever happens to be available when the female has finished mating. If she’s in a cage, she’ll usually lay them on the walls of the cage. If you put a paper bag in the cage, she’ll lay at least some on the bag, which makes the eggs easier to move or give away.
This shows the stages of a Cecropia from the egg to a caterpillar that’s ready to make its cocoon.
These eggs were laid on a brown paper bag. They’re about 1/8 inch long.
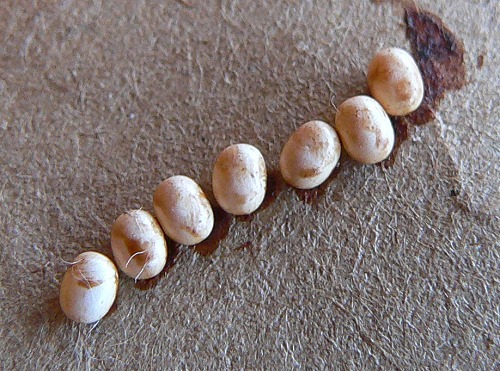
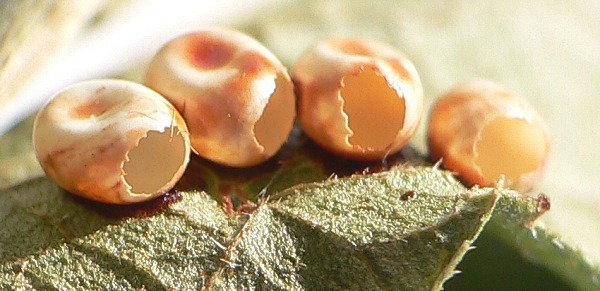
Keep watch on the eggs, and a week or two after they were laid, the caterpillars will start to hatch.
Hatched eggs
At first the caterpillars are tiny – less than half an inch long – and black with black spines.
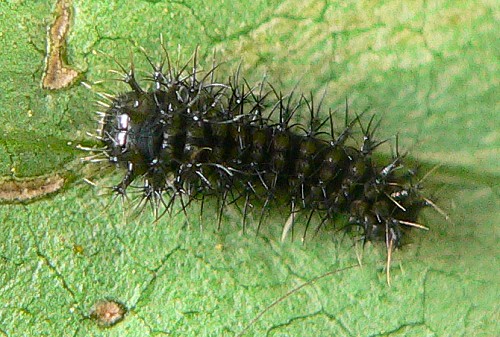
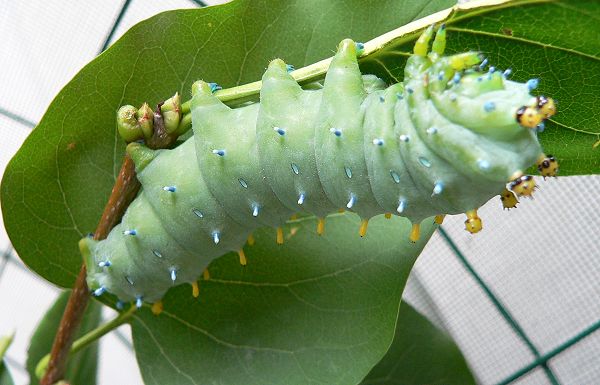
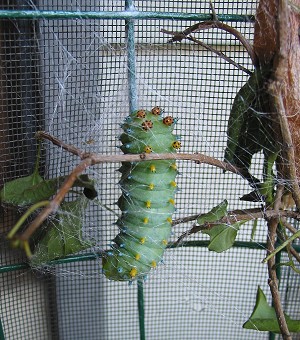
Caterpillars’ skin doesn’t grow, so when they get too big for their skin they shed it and expose a new larger skin underneath. Each of these stages between shedding is called an “instar”. Caterpillars will go through five instars before making their cocoon. The skin of each instar is a little different. Here are some later Cecropia instars.
Second instar
Third instar

Fifth instar
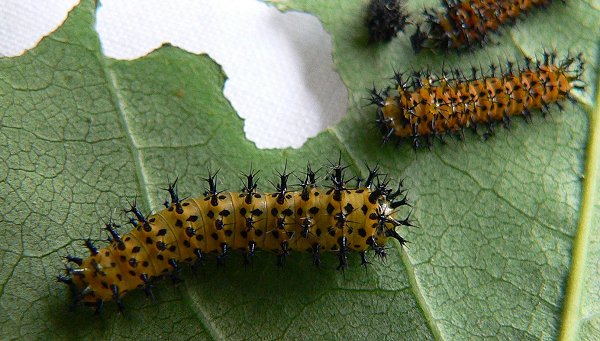
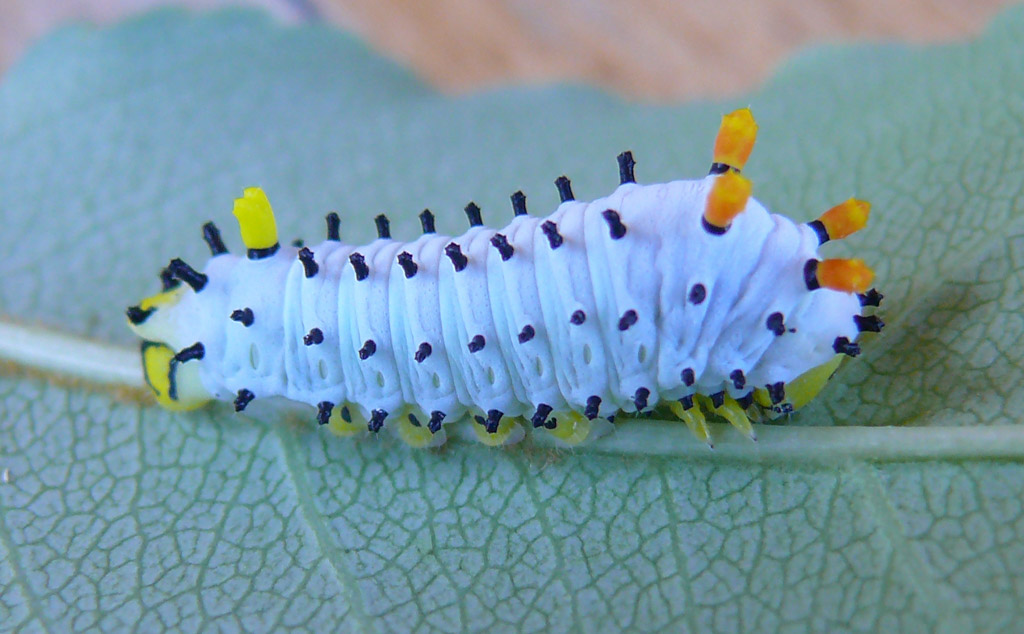
Here are examples of caterpillars of the other species (remember – each instar looks a little different).
Polyphemus:

Promethea:
Luna
Caterpillar Food
The caterpillars will need to start eating right away. They all eat plant leaves, but each species is particular about the kinds of leaves it will eat. Here are lists of food plants I’ve seen listed for each species. (The first plant on each list – in bold- is what I fed my caterpillars.)
Cecropia: lilac, alder, apple, ash, beech, birch, box-elder, cherry, dogwood, elm, gooseberry, maple, plum, poplar, white oak, willow (Bugguide)
Polyphemus: oak, birch, grape, hickory, maple, willow, rose (Bugguide)
Promethea: wild cherry, apple, ash, basswood, birch, lilac, maple, sassafras, spicebush, sweetgum, tulip-tree, button bush, magnolia (Bugguide)
Luna: black walnut, birch, persimmon, sweet gum, hickory, pecan, sumac (Bugguide)
Once the caterpillars start eating, they like to keep eating the same thing, so choose a kind of leaf that you can get plenty of. Be sure you don’t have to collect it near a golf course or anywhere there may have been chemicals sprayed to kill insects.
Where to keep your caterpillar
The caterpillars need to be in a cage so they’re safe, and don’t wander off and get lost.
If you are starting with eggs, or small caterpillars, the cage needs to be very secure – with no holes or cracks. When the caterpillars first hatch they go looking for something to eat. If they find a crack in the cage before they find the food, they may escape. The cage for the eggs and tiny caterpillars should have a little air circulation, but not so much that they dry out. A glass jar or plastic box with a screen stretched across the top works well. Cages for larger caterpillars should have more air circulation so they don’t get sick – so cages made of screening material work well.
If they are going to be outside, the cage should keep them safe from predators – birds, mice, cats, insects and spiders. The screening material should be very fine mesh – window screening or smaller – to keep out insect predators. I keep my cages on a screened porch. The two layers of screening – one on the porch and one on the cage – seems to completely exclude predators.
If the cage is made of glass, be sure the top lets in air, and keep it out of the sun. The sun heats up the air inside and will cook the caterpillars.
Examples of cages you can use are:
Large glass jars with screen/mesh tops
Aquariums with screen/mesh tops
Old bird cages with plastic screening or fabric wrapped around the outside
Hand made cages using wire, plastic or wood, and wrapped with plastic screening material.
Plastic boxes covered with screening or fabric
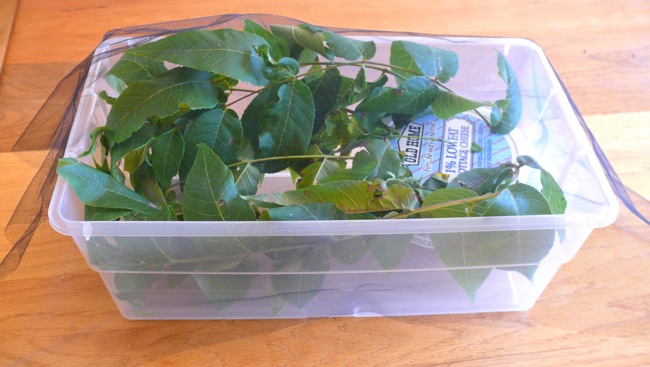
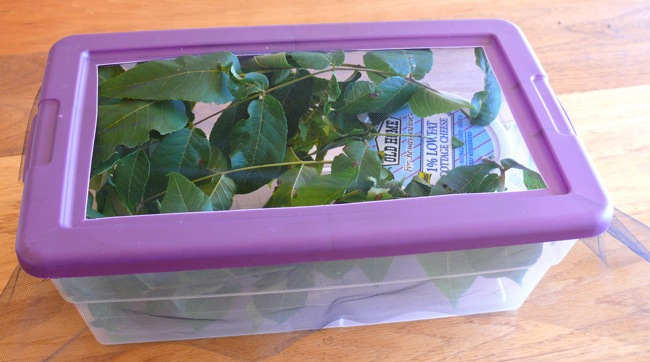
Here are two kinds of cages I make for my caterpillars.
This cage is especially good for small caterpillars. It’s a plastic box, with a lid that snaps on.
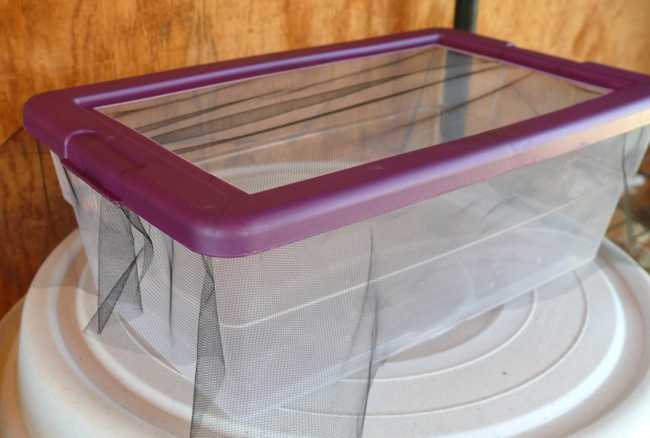
I cut out the center of the lid, lay a piece of gauzy fabric over the box, and snap the lid edge on over the fabric.
Here’s the box with caterpillars inside, and the fabric draped over the top.
Here it is with the lid snapped on.
This cage is better for older caterpillars. It has small cracks between the top and bottom and the sides, so if the caterpillars are too small, they can escape. Sometimes, if they start to run out of fresh leaves, I find caterpillars crawling around on the outside of the cage. But large cages like this – made with 20 inch saucers and 2 feet high – will hold 10 or 12 large caterpillars.
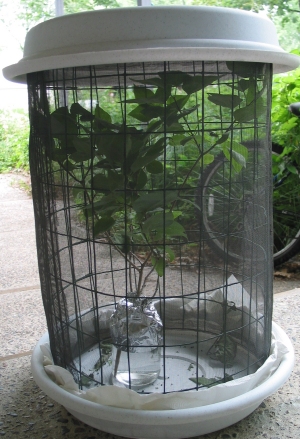
Materials:
Plastic coated fencing that comes in 2 foot high rolls
Plastic screening (also comes in a roll)
2 large (20 inches in diameter) plastic saucers (the kind that are used under large plastic plant pots)
Needle and thread
Instructions:
Unroll enough of the fencing to make a cylinder that exactly fits inside one of the plastic saucers. Cut and fasten the wire cylinder together.
Cut and sew a piece of plastic screening around the outside of the fencing.
Use the two saucers as the top and the bottom of the cage.
Smaller cages, like glass jars, should only be used if you’re raising one or two caterpillars. It’s better to use larger cages for larger numbers of caterpillars. If the caterpillars are too crowded they may get sick.
Feeding your caterpillars
You need to find a way to offer the caterpillars fresh leaves but protect them from drowning. Caterpillars aren’t very smart about open water, and if the stems of the plants are in a jar of water, they will climb down the stems and drown. Access to the water can be blocked with a crumpled piece of waxed paper or plastic wrap stuck between the stems. Or you can put the water in a plastic container with a plastic lid. Punch a few holes in the lid for the stems to go through. (Be sure all the holes are filled – or cover unused holes with tape – the caterpillars will find any open holes.)
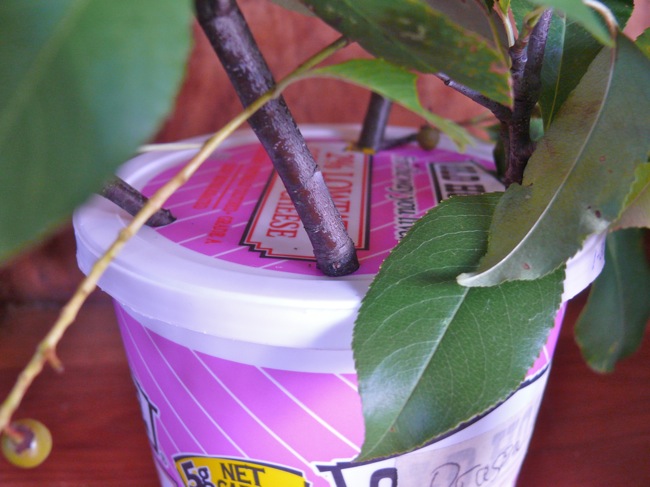
Here’s an example of a plastic water container.
Put fresh leaves in when the old leaves look wilted. Usually the caterpillars will move to the fresh leaves quickly, but check the wilted leaves before you throw them out to make sure you aren’t throwing out any caterpillars. (To be sure I don’t throw out any caterpillars, I put all the used leaves into a bucket – a clean 5 gallon plastic pail works well – along with some fresh leaves. If I check on them the next day, any caterpillars that I missed will have found their way onto the fresh food.)
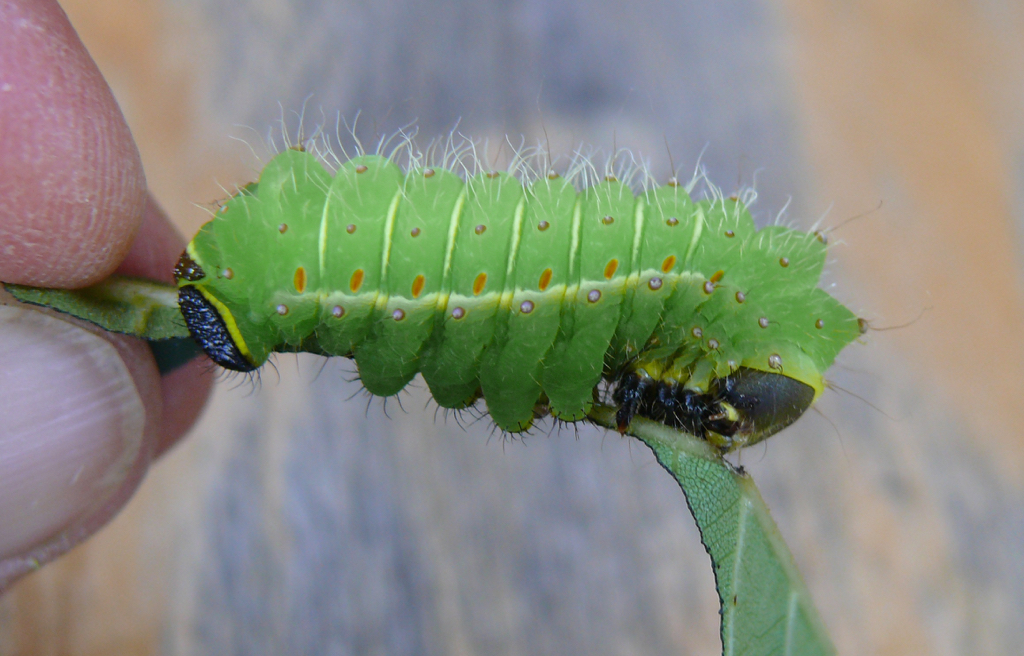
When I move the caterpillars to the fresh food, I try not to touch them. They do better without much human contact. There are a few other reasons not to touch caterpillars: they can get sick from bacteria from your hands; they are fairly fragile, and even light squeezing isn’t good for them. Also, some have stinging spines (Cecropias and Polyphemus don’t, but Buck Moth and Io Moth caterpillars do, and the spines can cause painful irritations on your skin).
Cleaning cages
Caterpillars produce “frass” – droppings – which will need to be cleaned out. When the caterpillars are small, the frass will be small, but when they get larger, the frass will be larger and messier. Clean the cages often, washing them with soap and water (not bleach), so the caterpillars don’t get sick. I clean smaller caterpillar cages every 3 or 4 days. Larger caterpillars need their cages cleaned every day or two.
Cocoons
In August or the beginning of September the caterpillars will be about as big as your thumb and ready to make their cocoons. They’ll wander around for a while, looking for a suitable place, and then begin building. The different species build different kinds of cocoons.
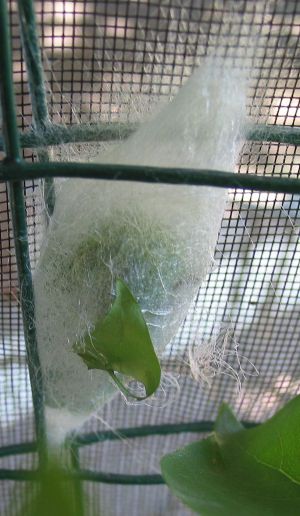
Cecropias build their cocoons by attaching to branches or the side of their cage. They start by throwing out silk, like spider silk, all around themselves.
They slowly surround themselves with more and more silk until they’re in a white silken cage.
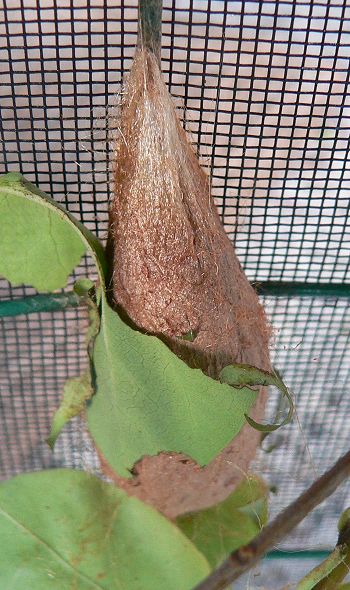
Then over the next day or two, the cocoon will turn brown and you won’t be able to see the caterpillar any more.
Polyphemus and Luna caterpillars make their cocoons on the ground, or on the floor of their cage. They usually incorporate dried leaves in with the cocoon.
Polyphemus cocoon:
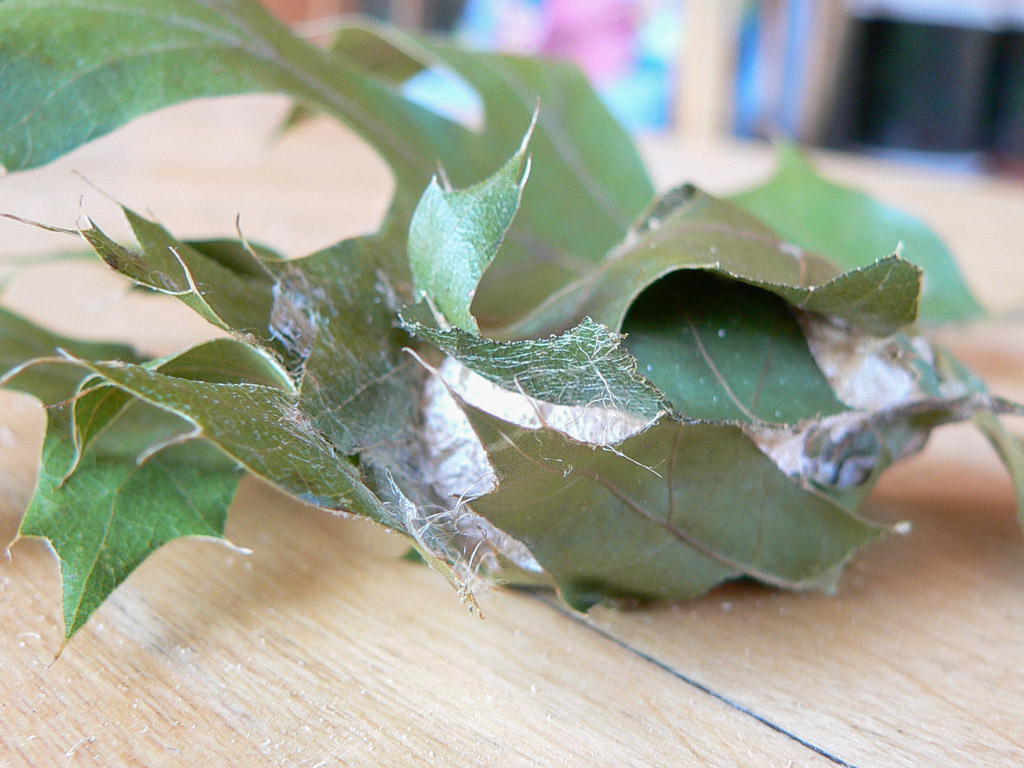
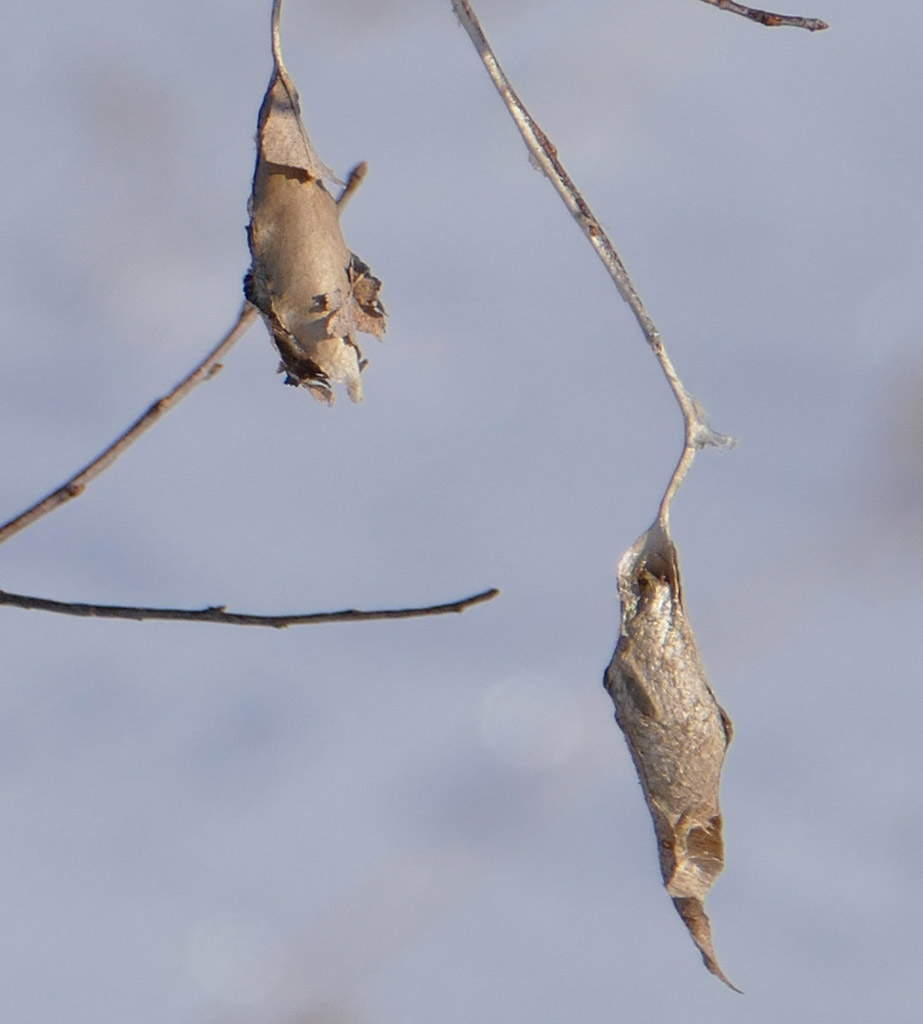
Prometheas wrap themselves in a leaf that’s hanging from a branch, and the cocoon will hang there all winter. These are two Promethea cocoons.
Winter
After the cocoons are finished and the weather is colder, they need to go through the cold of the winter.
This outdoor stage is very important – they need to go through a winter because it keeps them on the same schedule as the moths in the wild. When they hatch, there need to be other moths hatching so they have partners to mate with. If you keep them inside in your warm house, the adults will emerge in the middle of the winter.
Cecropia and Promethea cocoons can be left outside in their cages. Luna and Polyphemus cocoons normally spend the winter on the ground, mixed in with leaf litter, protected by an insulating layer of snow – so when I overwinter these species, I keep them in the refrigerator so they don’t get too cold. I put them in a plastic container with a lid, and add a small wadded up piece of paper towel moistened with a few drops of water. Every 6 weeks I refresh the water on the towel. (Otherwise your frost-free refrigerator will dry out the cocoons.)
Spring
The next spring the moths will emerge sometime between the middle of May and the middle of June. The warmer the weather, the earlier the moths will emerge. If you’ve kept the cocoons in the refrigerator, put them outside once the weather starts to warm up – usually around the end of March. When it gets close to the right time for them to emerge, check the cocoons every day to be sure not to miss them. It’s a good idea to keep the cocoons outside at least until they start hatching to be sure they are in sync with the wild moths.
Emergence
The moths will usually emerge in the middle of the day, and spend the day pumping up and drying their wings. Here is a series of photos of a moth emerging. This happens very fast – it takes less than a minute – so this is the only time I’ve been able to watch it.
By the time it gets dark they’re ready to fly.
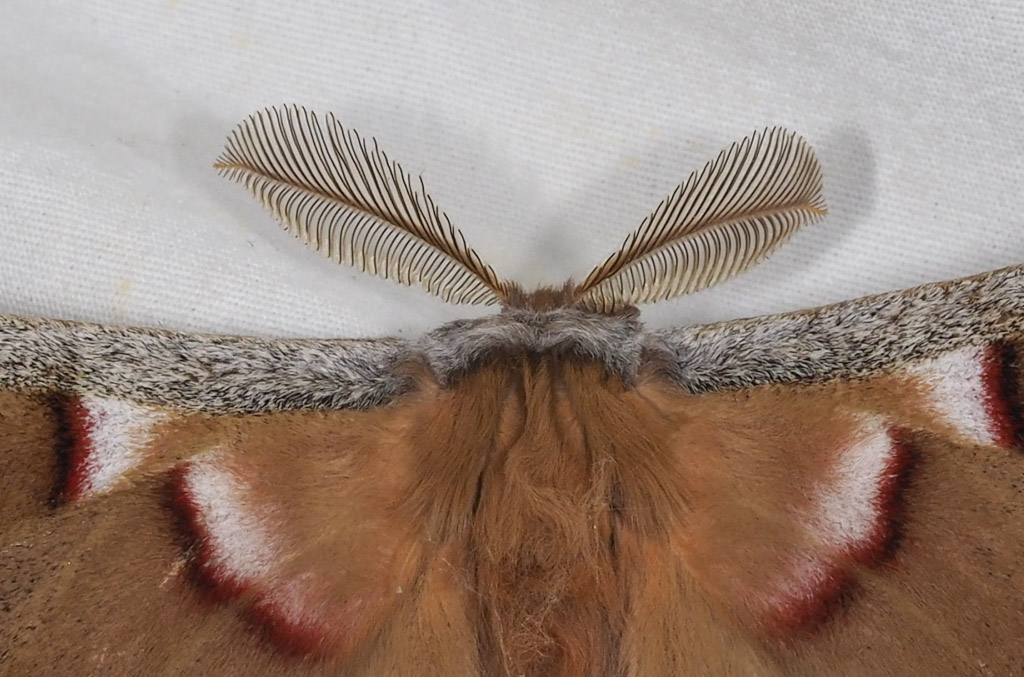
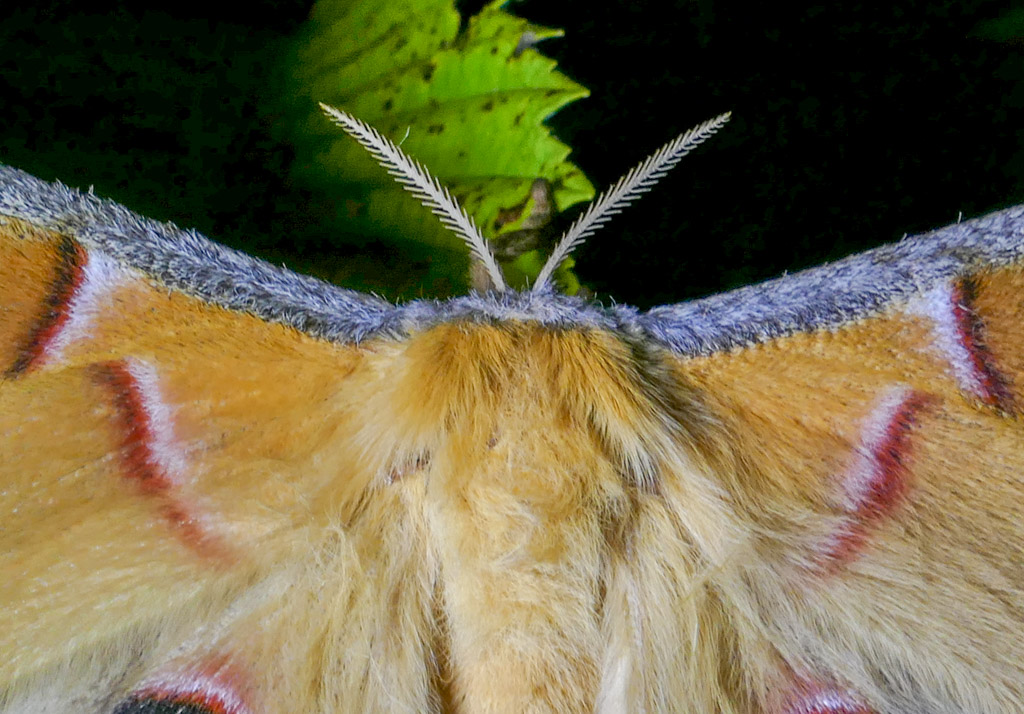
Now you have to know if you have a male or a female moth. Males have very large, feathery antennae. Female antennae are much thinner. Here are two photos to help you see the difference.
Male Polyphemus antennae
Female Polyphemus antennae
Prometheas are the only one of these species that has differently colored males and females.
Male Promethea:
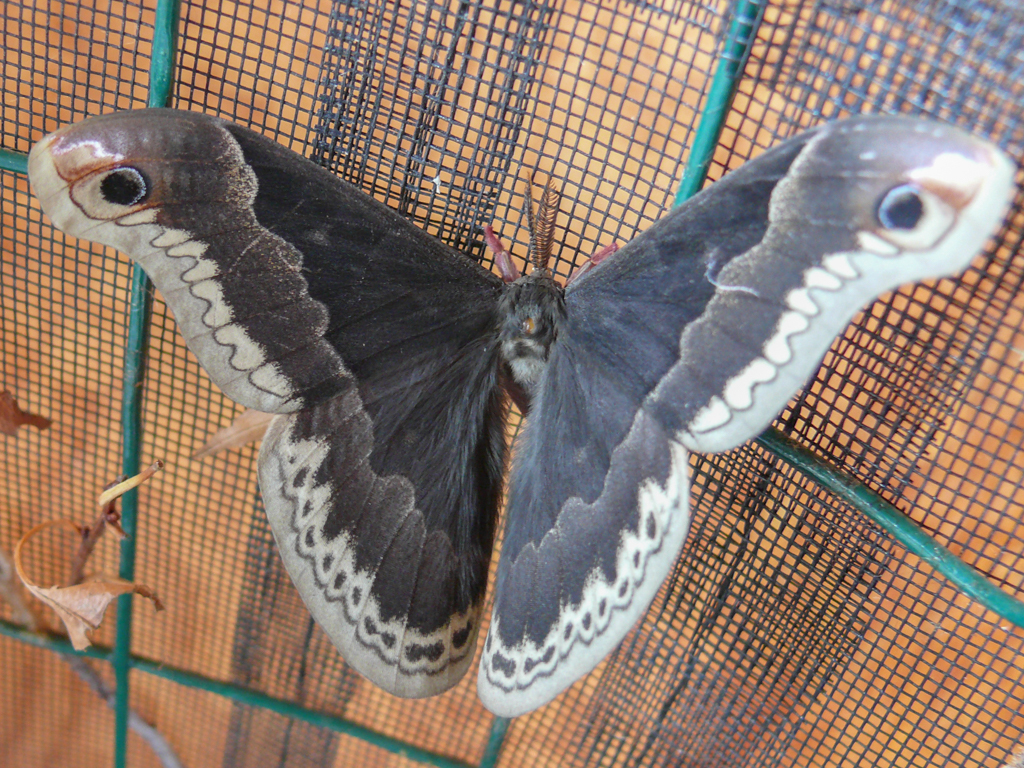
Female Promethea:

If you have a male, release it when it gets dark. If you let it go in the light, it will be visible to predators and it may get eaten.
If you have a female, you have a choice – you can let it go to live its life in the wild, or you can keep it for another day and watch for a male to come to mate.
Mating
The job of the adult moths is to mate and lay eggs. They don’t eat at all, so they have to get everything done in a few days.
The female moths don’t fly very far – they sit in one place and send out pheromones into the air to attract males. The males scent these pheromones and fly to the females. Cecropias, Polyphemus and Lunas all mate at night. Prometheas mate in the late afternoon.
The mating pair will stay coupled for hours – often overnight. At some point they’ll separate and the female will fly off to lay her eggs, and the male will fly away to try to find another female.
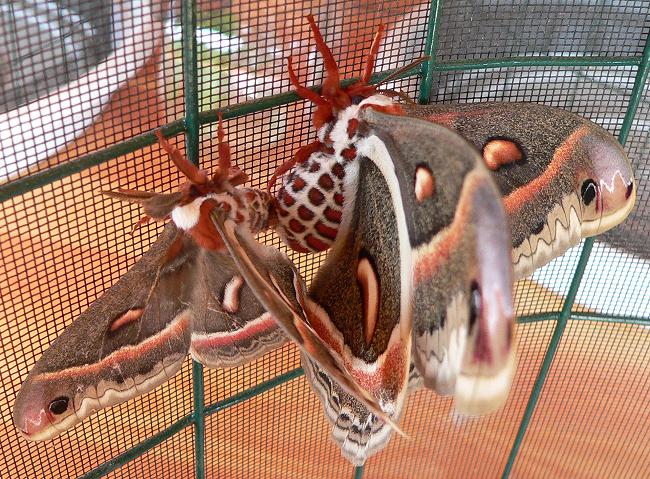
If you want to mate a female, you can put her in a cage with large enough holes to allow her to mate through the cage. Here’s one of the mating cages I use. It’s made with 1/2 inch plastic coated hardware cloth, bent into a cylinder, with plastic plant saucers for the top and bottom. You can put a female in one of these cages, put it outside, and in the morning – or afternoon if it’s a Promethea – you’ll usually have a male clinging to the outside, and mating with the female.

In this case, I opened the top of the cage to let the male in, and then closed it to keep them safe until they were finished mating. The female is larger than the male, and has a much larger abdomen – it has to hold all those eggs.
Release the male as soon as it gets dark. You can either release the female then, or keep her for a while, until she lays some eggs in the cage, and then release her to lay the rest in the wild.
Don’t forget – if she lays eggs in the cage, they will hatch in about a week, and you’ll either have to feed them, or release them onto a plant that they can eat.
Answers to Frequently asked Questions:
I don’t sell moths, eggs or caterpillars or have any to share.
If you want to try raising them, it’s best to get them from close to where you live. If you get them from a place with different environmental conditions, even if the species is native to your area, their timing or food preferences may be different and they may not survive.
To find caterpillars to raise – see if you can find someone near you who is raising them and ask if they’re willing to share. Or put on some bright outside lights at the end of May or June – or whenever the adults fly in your area – and see if one is attracted to your lights. If you find a female, you can put her in a paper grocery bag overnight and she’ll lay eggs on the bag. Be sure to release her the next day so she can lay the rest of her eggs in the wild.
If you keep the cocoons inside and an adult emerges during the winter, there’s nothing you can do for it. It will live about a week and then die. If you have more cocoons in the same place, you might want to move them to somewhere that has outside temperatures. If the pupae haven’t progressed too far, it may slow them down enough that they’ll wait until the proper time to emerge.
Here are some useful links to learn more about moths and butterflies:
Watching Moths – my page about how to attract and learn more about moths.
Bugguide.net – an online collection of insect photos, and a community of people who are interested in and knowledgeable about insects. A great resource for learning about insects.
The Caterpillar Lab – loads of information and programs about caterpillars and what they turn into.